|
Cedar-Turquoise River Table
Cedar Epoxy Resin River Table inlaid with turquoise and black sand A comprehensive overview/guide of the process 12/18/2018 Table completed: August 2018 Designer/Artist: Ryan Ogilvie Time Spent ~40 hours (5 saturdays) Material Cost: ~$500 |
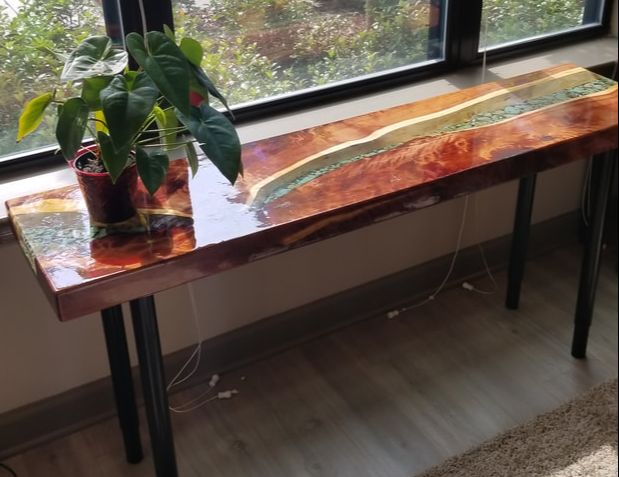
Cedar Turquoise River Table: Final Table Design
|
Purpose:
This is a guide on how to make a table similar to this. The tools and materials used are explained in detail step by step. The different approaches on how to make the table are discussed as well.
This is a guide on how to make a table similar to this. The tools and materials used are explained in detail step by step. The different approaches on how to make the table are discussed as well.
|
Picking out the Materials:
River table: For Conceptual design there were many ideas, with the main idea was being a resin table. With a little research, a river table looked most promising. A river table typically takes a slab of wood and cuts it in half. The rough edges (live edges) become the middle while the cut edge becomes the sides. This allows a weirdly shaped slab to have straight edges. Wood selection: There are typically many places to get wood, from a local shop to an online store. Whichever fits within price range and is the size you want. The wood slab was bought from this site: woodslabs.com The company typically will tell you the length and the lowest and largest width. Keep in mind it will be cut down a bit so plan accordingly. The piece chosen was about $140. Before even buying it, I could see pictures of the front and back, and a little bit of photo editing showed how it would look after cutting in Figure 1&2. |
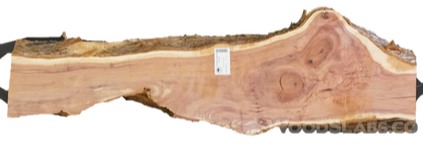
Figure 1. Original slab
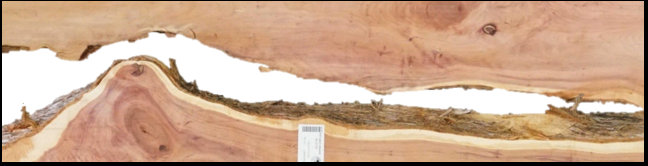
Figure 2. Conceptual Design created from online pictures
|
Planning the look:
There are many alternatives for the final look of the table. For the table above I decided to inlay it with turquoise sitting on top of painted black sand. This was done to make it not completely see through, and add an artistic touch. Turquoise cost $60 from eBay for 2lbs. It was rough chalk Mexican turquoise. From testing it was found the epoxy brings out the color so rough stone can be bought for a lot cheaper. The table can be made see through, light up, or other. See references section for other ideas.
Resin: [6]
When looking up resins there are two major applicable options: A slow setting versions designed for thick pours that's more expensive or a fast setting resin that is designed for thin pours such as counter tops that's cheaper. The fast setting requires many separate pours typically about 1/8" at a time between multiple hours. This can be tedious because you have to pour after usually about 4 hours later and no later than a half a day without having to re-prep. This can take maybe 6-20 times depending on thickness. Read instructions for exact thickness and time to pour. If you pour too much it will crack because it gets very hot because it sets quick. If you're worried on the time commitment and can pay more for slow setting stuff, you can save a lot of time. You can do a single prep, then single pour, saving a lot of time and effort. The slow setting stuff is almost unlimited thickness.
Here are some options:
Fast setting: Pro Marine Epoxy
Slow setting: Glass Cast 50 or Ecopoxy Liquid Plastic
Ecopoxy Liquid Plastic was used for the main pour, and the Pro Marine Epoxy was used for a surface finish pour, mainly because Ecopoxy Liquid plastic ran out. Different types of Epoxy's can be typically switched between seperate pours with little visual effect. Other than setting, the differences aren't very much, some are little better quality and age better. See reference for more details, however there is little reference to slow setting epoxy.
|
Materials:
Cedar wood slab Black Sand Table legs Turquoise (Mexican Rough Chalk from eBay) Ecopoxy Liquid Plastic (see resin section for alternatives) Materials for Resin Form: Melamine Board Tyvek Tape Wood Screws |
Tools:
Table Saw Random Orbit Sander Sanding Paper - 60 to 320 grit Router Sled with Router & Flat bit or Planer 45° angled bit for router Hot air gun, Hairdryer, or ideally small torch Clamps Drill Chalk line Large Framing Square |
|
Wood Preparation
Sanding: To begin the entire piece was sanded, mainly to remove all the bark, this can be seen in Figure 3. To do this, a random orbit sander was used. Take the time needed, as this will be the inside edge look when it is all completed. Center line cutting: This step cuts the entire piece down the middle. It was marked in figure 3 according to the drawings in Figure 1. A chalk line is the most ideal tool for this. To cut it a table saw was used and a table was placed next to it to support the long length of board. The wood was slowly fed through. Rollers such as PVC pipe were placed under the wood to help this process. This center line cut will end up being the long table edges. It is critical to take this step slowly and make this cut as accurate as possible as this will heavily effect steps down the line. The Cutting setup is shown in Figure 4. ** Note: This method was pointed out that it may have a potential for kickback since it was done freehand. If you attempt something similar to this method, attach a large enough piece to the slab to create a flat edge to push up against the fence. Also use a riving knife. The flat edge keeps the piece from bending the blade one way or the other when trying to correct inaccuracy. Bending the blade can cause kickback. Alternatively, a circular saw or a track saw can do the trick if they are powerful enough to cut through the thick slab. Sizing: The fit was tested to size the table. One half slab was flipped on one side so it fits together nicely with the other half for the table. Resin is very expensive so the half slabs were shifted so the pieces can be as close together as possible. This leaves a couple inches on either side. The shorter side on each was marked using a square relative to the edge that was cut earlier and cut as little as possible to make it square. Then the longer edge was cut off to match, in this case a few inches on either side. The final fit is shown in Figure 5. In the final fit, the pieces are checked that all sides are square, and the final dimensions are taken for the next step. If they are not perfect (i.e. greater than ~1/16" difference) Then repeat the sizing step to ensure it is square. |
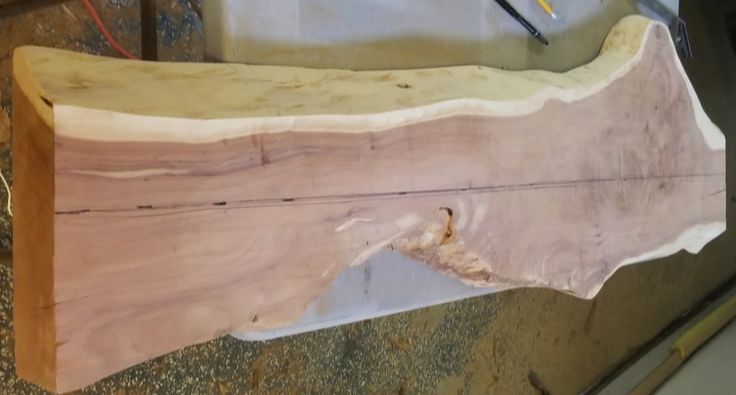
Figure 3: Sanded & marked slab
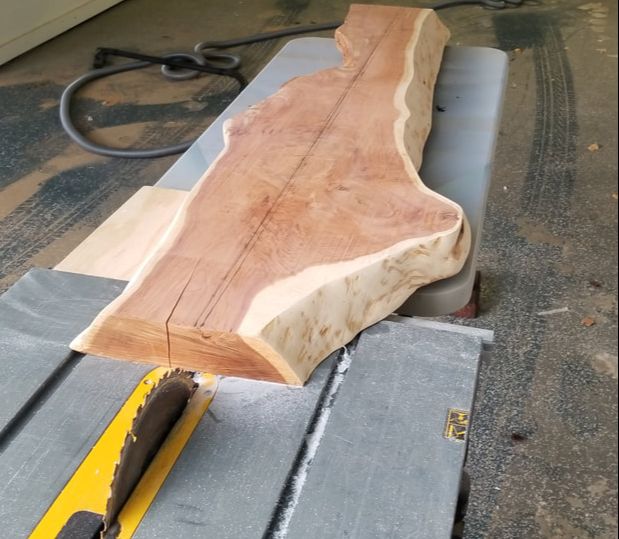
Figure 4: Slab Setup for Center Cut
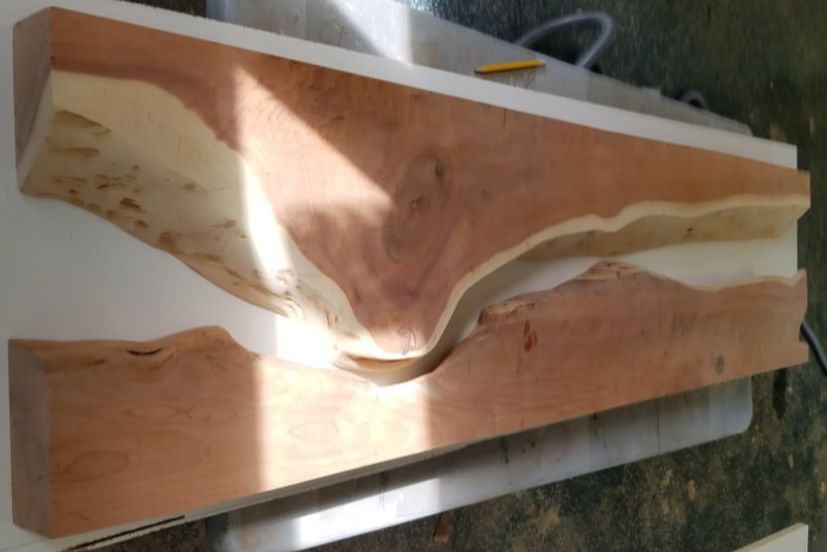
Figure 5. Sized slab
|
|
Creating the Mold
Overview: Using the dimensions from before, a mold should be created to pour the resin. Dimensions on this piece are important. Sanding/Planing in the removal from the form step will correct for small inaccuracy but can't fix big inaccuracy. This uses melamine board since it is nice and smooth. DO NOT pour directly on the melamine board, it will stick, you need to prep it first. Typically by adding Tyvek tape. Some people use acrylic as a substitute, it can be poured directly onto acrylic without sticking, however acrylic is more expensive. [2] Do not expect the melamine board/mold to survive intact after. Building the Mold: To start cut a bottom piece a couple inches wider and longer than the table dimensions so the sides can be screwed on. Then cut two pieces the width of the piece (width being the length that includes split where the river section will flow). Cut the width pieces as exact as possible. Then cut two more pieces the length of the piece + a couple inches. The height of the length and width pieces should be the thickness of the piece plus ~1/2" to 1". Add tyvek tape to one side of every piece overlapping the tape. Check the fit by placing the slabs and sides on the bottom board as shown in Figure 6&7. Start by attaching the width piece on the board followed by a length piece next to it. This is done with a drill and screws Use a square when attaching the first length piece. Then put the slabs in place. If they are not square it is very easy to see now, correct as necessary. With the slabs in place push the second width piece onto the far edge into the slabs to get as close of a fit as possible. Screw on. Lastly place the final length piece on. Make sure the tyvek tape is all facing inwards. Sealing the Mold: This part is tricky, since despite sealing there were still minor leaks when the resin was poured. The method used was sticking tape around the edges. First remove the slabs from the form. Then carefully place the Tyvek tape so every edge/ corner is sealed at the joining on the inside. Take extra care with the corners. Figure 9 may show some Tape on the outside as an attempt to fix leaking, however, it is much easier to take time to make sure it is sealed from the inside. After the edges are sealed put the slabs back in place. Push the slabs as close to the length sides as possible. A hot glue gun could potentially be used to seal the inside edges/corners of the form instead of tyvek tape. Once this is done you are ready to pour the resin. Optional: A hot glue gun was used to seal the edges where the slabs interface with the board/tyvek tape. The resin got through and pretty much filled all around the piece in the mold to an extent, therefore it did not work well. It may be better to skip this step if there are many cracks in the wood in which the resin can seep through. |
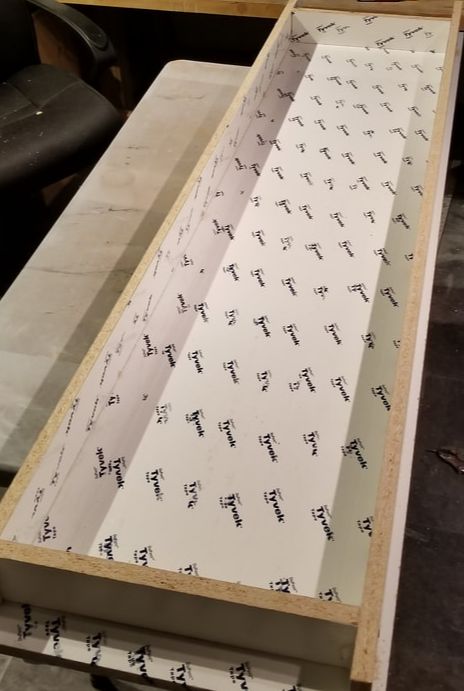
Figure 6: Mold
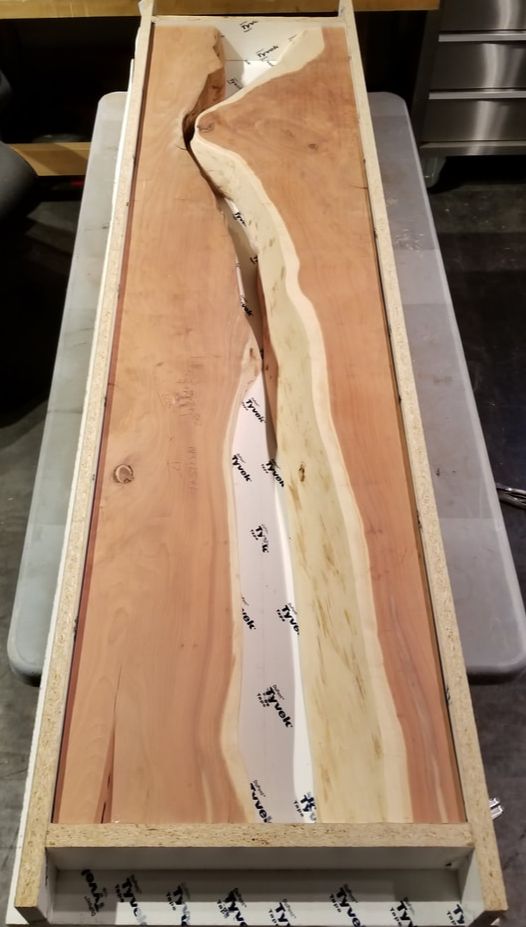
Figure 7: Slab in Mold
|
|
Pouring the resin
How much to buy: The amount of resin is estimated by approximating the volume of the center separation. The best method to do this is taking measurements from one side of the slab to the other along the center edge for each half then average and multiply by thickness and length to get volume. It is suggested to order about 25% more than is estimated using this method to account for crack fills and inaccuracy. Details/inlay/prep: Before you pour, make sure slabs are pushed as far to the side as they can go. Place all inlaid objects between the slabs or wherever it is planned to go. In this case the black sand was placed, then the turquoise was placed on top. This was experimented with a bit to see how it looks, in the end it is up to the designer. Or it can be a see through table, in which case skip this step. Seal Coat: Before starting, read all the instructions of the epoxy manufacturer. Make sure to keep in a warmer location since the resin will not set in the cold. Regardless of which resin you get, you should start with a seal coat, shown in Figure 8. Notice how this first coat will demonstrate how the color will turn out. This is simply a brushed on coat to seal most cracks in the wood. Let sit for the time suggested by the resin manufacturer then move onto the flood coat. Bubbles will form, a good seal coat will help to avoid them, but cannot stop all of them. Potentially, multiple seal coats could help this issue more. Clamping down: Clamp down the pieces as shown in Figure 9. The slabs can also be screwed in from underneath if it is easier. The top will be planed so the effect of clamping will go away. Use small pieces of wood covered in Tyvek tape to be the main interface between the clamping boards and the slabs. This ensures they will be able to be removed later since resin will flow around them Flood Coat: This next step varies depending on which resin you get. If you have slow setting resin, you can pour all at once. However, if it is a lot and it is the first time one does it, I would separate mixing into stages to get a hang of it. If using fast setting resin, read the manufacturer label to see how thick you can pour. Using the volume estimated above and multiplying by (thickness pour/thickness of the table) you can get the amount to mix of each time. Fill all the way up to the top and fill over the top. The resin will lower in height as it fills in the cracks of the slab. A small torch or hot air gun can be used to pop the bubbles. Notes:
|
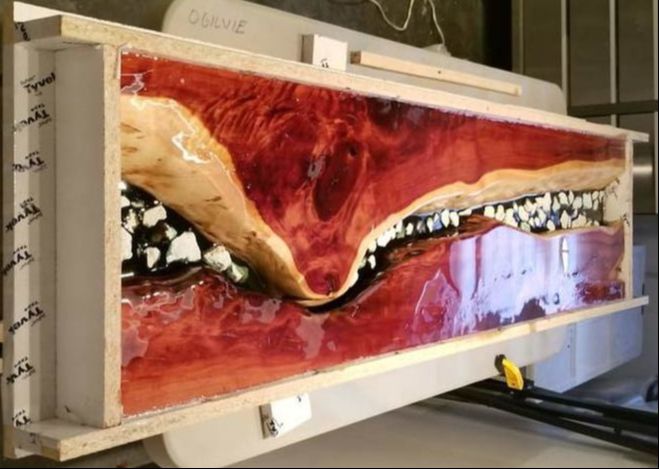
Figure 8: Seal Coat

Figure 9: Flood coat
|
|
Removing, Planing, and Final Cuts
Removing: Wait for the full set according to the manufacturer. This could be a day to a week. Once the Resin is set remove it from the mold. Remove clamps and unscrew any screws that are holding the mold together. Remove sides, this can be accomplished by hand or by hammer if necessary. Do not worry about the look of the top or scuffing it using a hammer, these will go away in the next step. Once the sides are removed, remove the bottom. A pry bar can help or clamping one side while you break off the bottom in pieces if it gives you a hard time. If you covered it properly with Tyvek tape, it will stick slightly but you should have little issue removing it. Figure 10 shows how it looked right out of the form. There were lots of Bubbles and poor edges which get fixed next. Surfacing and Planing: Access to a planer was unavailable during this build so instead a setup using a flat bit router and a sled was used shown in Figure 11. The sled was built from leftover melamine board. To make one, simply crate a box around the object with constant height then make a sled that can slide over the box with enough space in the middle for a router bit. Height is just a little higher than the thickness of the board so the sled slides over freely. Take time to carefully go over each side, or just the top if the bottom is unimportant. It was cut as deep as needed to get rid of the imperfections, in this case about 1/8". It takes some time, however this was carefully done in one pass. Take multiple passes if needed. Sanding will get rid of the lines created. Squaring sides: The piece had to be put through the table saw one last time for each side. Ideally, find some way to hold it in line. However, the rough edge was used to guide it on the fence. The fence was set to about 1/8" away from the blade. The piece comes out more or less straight. Edges: Because the corners are sharp at this point, an angle router bit was used to make a 45 degree cut edge around all edges and corners. This can also be an aesthetics decision based on how the piece is desired to turn out. Sanding: Once the final form is roughly finished, the next step is sanding. The piece was sanded from 60 grit up to 320, however 220 may be sufficient for the final coat. 60 grit is the most important. Using a random orbit sander the lines from the finishing cuts are slowly removed. Do not move on to the next grit size until all lines from cutting have disappeared. The lines can be seen in Figure 11, and removed in Figure 12. Once the lines are gone slowly move up to a higher grit size until you reach the highest grit. The piece was finished using a final seal coat on top. |
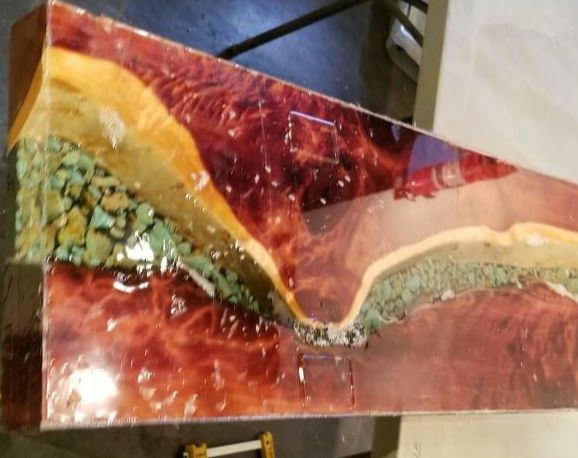
Figure 10: Table out of Mold
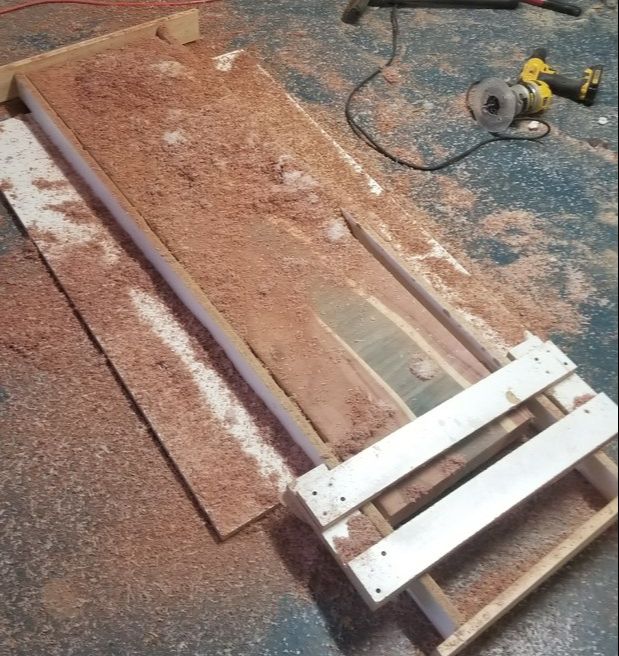
Figure 11: Planing using Sled

Figure 12: Final Cuts and sanding
|
|
Finishing
Final coat: To Finish the piece a final coat of resin was added. This was brushed on with a much cheaper faster setting resin. However, before this was done, there was still a few bubble crevices at the surface with wood dust in them. A mini pick and air canister helped clean them out before pouring. Be sure to keep the piece in a warm dry place with minimal FOD (foreign object debris - such as wood dust). There will be no final touch ups after this step. The piece was lifted up from the center of the bottom so the bottom edges could get covered with resin. Simply brush on the resin across the whole top and edges like in the seal coat phase. Take care to pop bubbles, and watch as the final form sets. Optionally it can be finished by polishing. This requires a lot higher grit sanding and eventually getting into polishing sets. It can be more time consuming and expensive if polishing tools are unavailable to start. It will give a less glossy look on the wood if that is desired. Support/Legs: Simple Ikea legs were bought to support the table. There are many other ideas for support, please see references for more ideas. The entire table can support me sitting on it ~160lbs no problem. It is assumed it can hold much more, although it is anticipated the legs will fail way sooner than the table will. Final Notes:
|
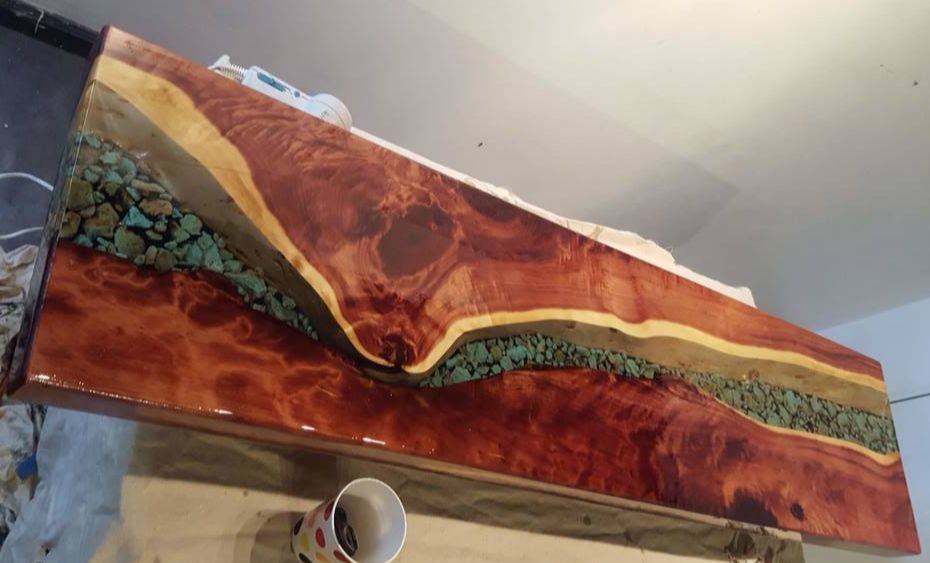
Figure 13: Final Coat
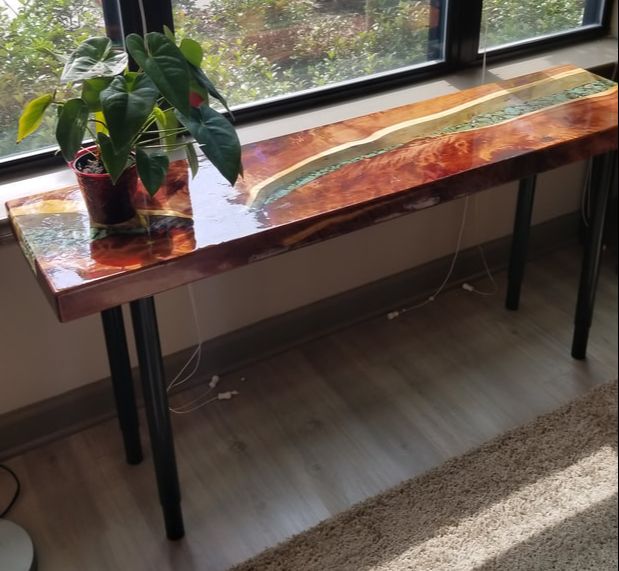
Figure 14: Final Table
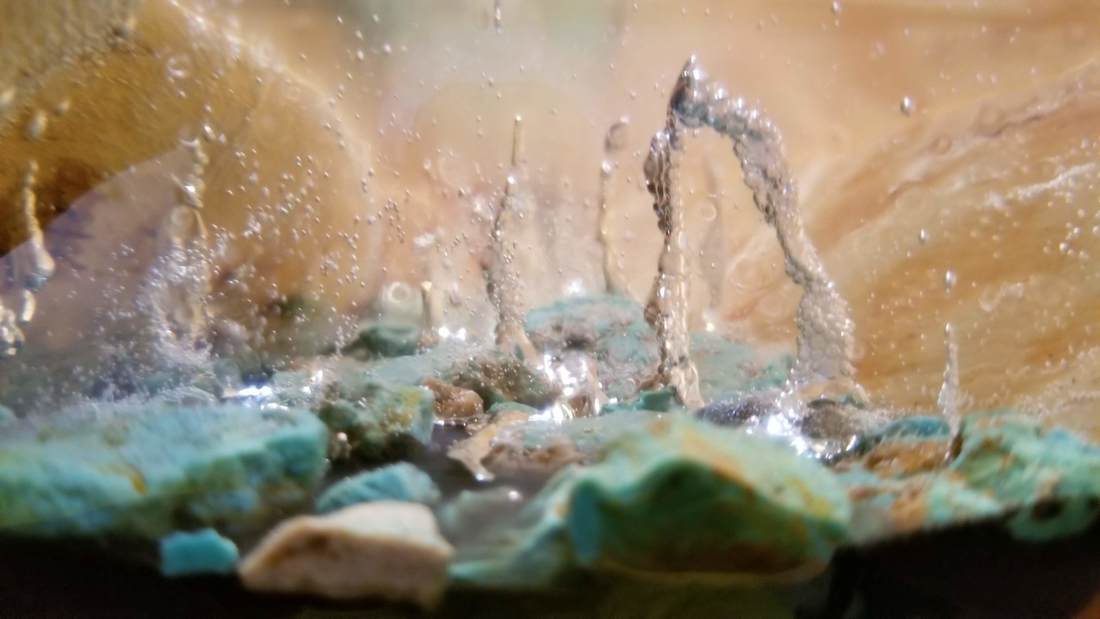
Figure 15: Spirals of Bubbles Forever Trapped
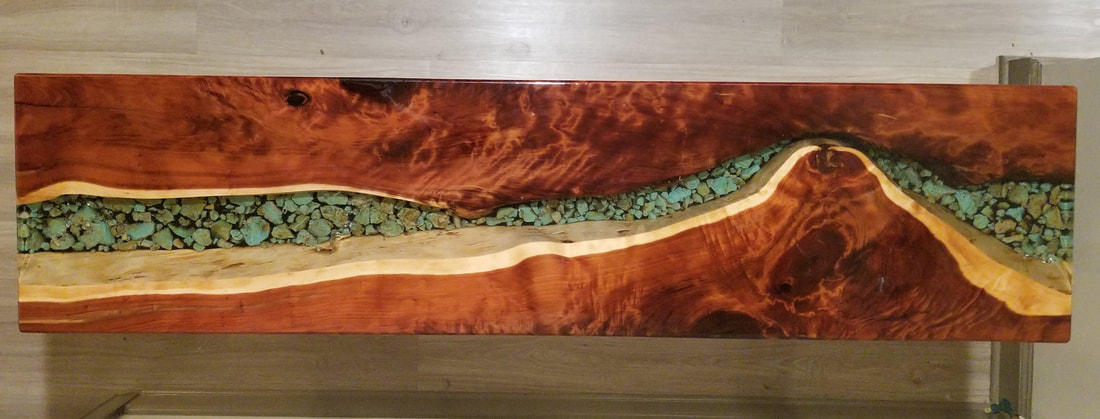
Figure 16: Top View
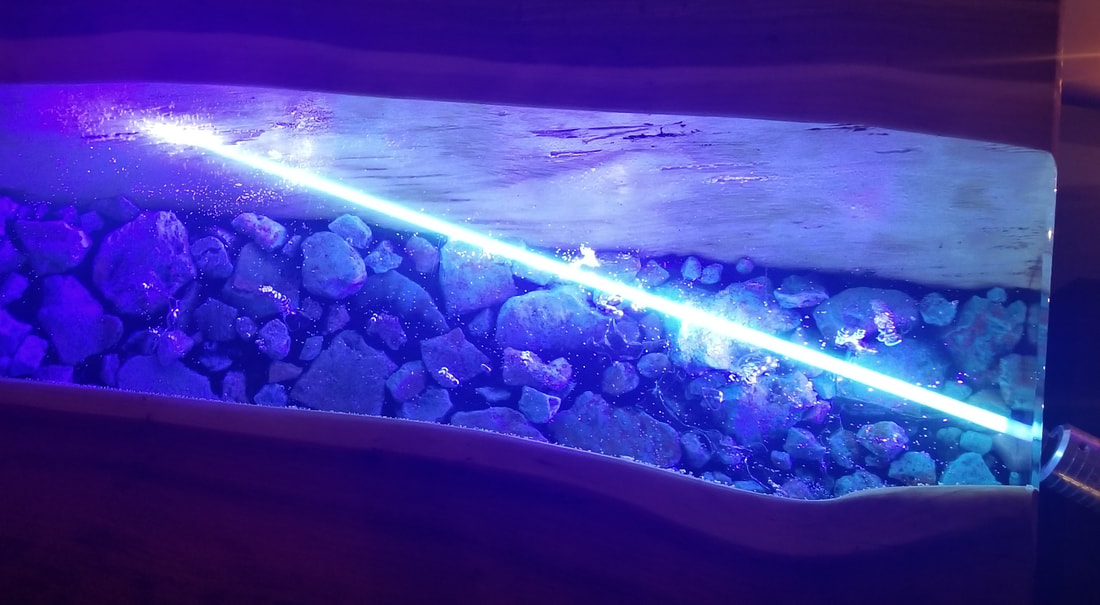
Figure 17: Bonus; High power laser through epoxy
|
References:
[1] DIY Epoxy River Table with Waterfall, https://fixthisbuildthat.com/diy-waterfall-epoxy-river-table/
[2] How to Make a Live-Edge Resin River Table: https://www.easycomposites.co.uk/downloads/How-to-Make-a-Resin-River-Table-GlassCast-Handbook.pdf
[3] How To Make a River Table Using Clear Epoxy Casting Resin and Reclaimed Wood, www.smooth-on.com/tutorials/river-table-clear-epoxy-casting-resin-reclaimed-wood/
[4] Epoxy River Coffee Table, https://www.instructables.com/id/Epoxy-River-Coffee-Table/
[5] How to Make an Epoxy Resin River Table: do-daddy.com/epoxy-resin-river-table/
[6] What Is Epoxy?, epoxycountertopdiy.com/
[7] How to make an Ocean Table // Concrete and Epoxy Resin, www.youtube.com/watch?v=xfqY0DTPlVg
